Introduction: Having driven
Marshal Nicolas Soult's French army from Portugal ,
General Sir Arthur Wellesley's 20,000 British troops advanced into Spain Madrid Spain


13.30 Deployment
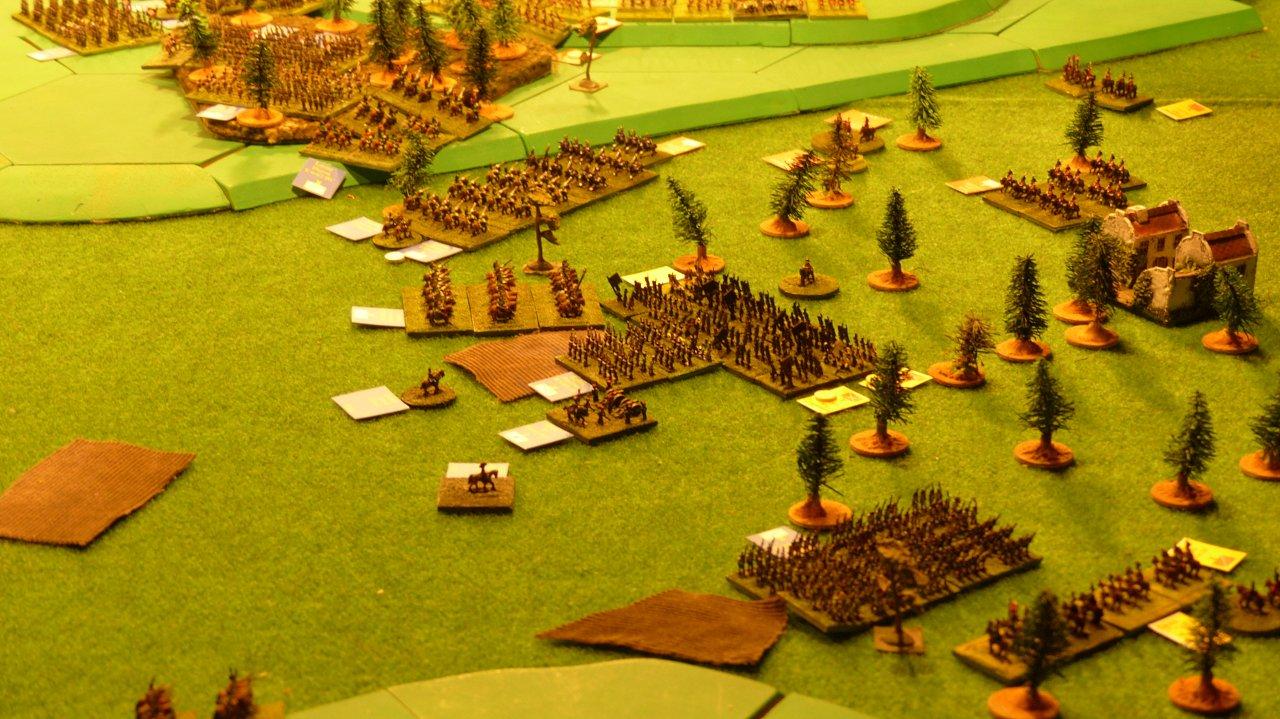
00.01 View from east across the battlefield. The French under Joseph
Bonaparte approach the allied positions from the South (left) whilst in the
right foreground the British under Wellington occupy the heights of the
Cerro de Medellin. In the distance the Spanish under Cuesta occupy a string
of fieldworks commencing with the Vergara redoubt up to the gates of
Talavera itself (visible in the background, right).
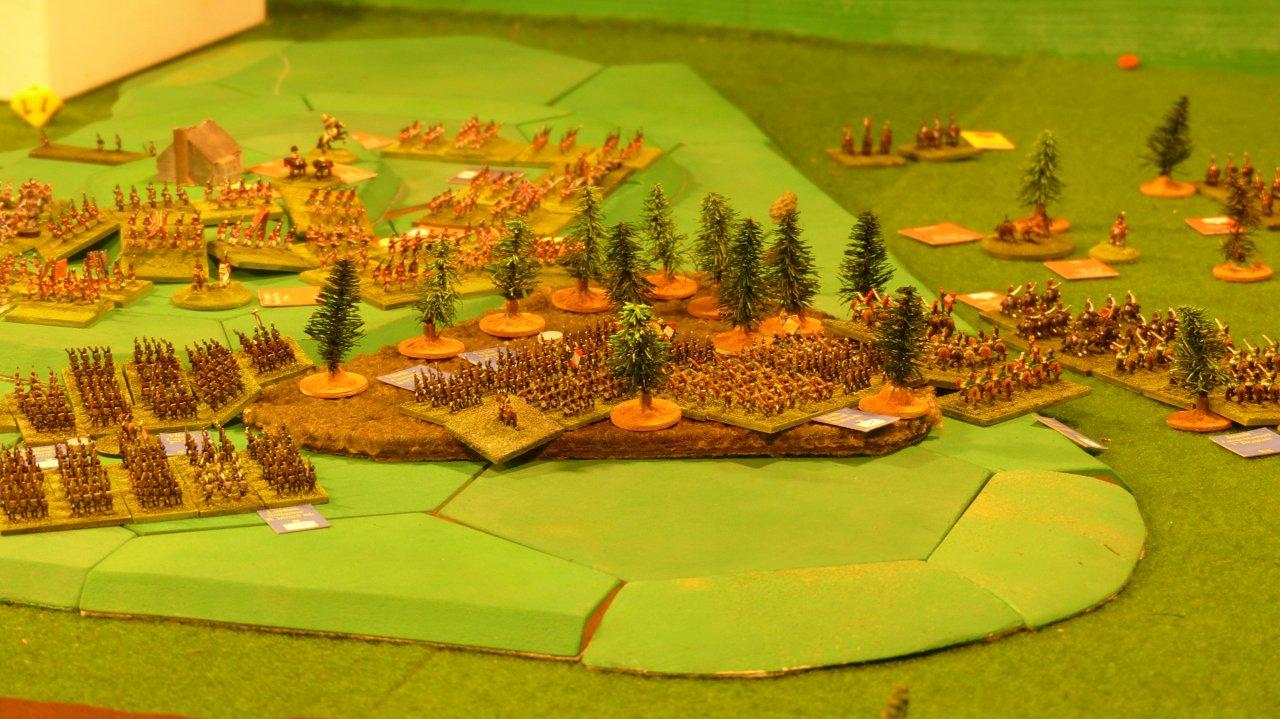

13.30 - 14.00
01.01 The battle opens with a massed French bombardment of the British
centre.

14.00 - 14.30
02.02 Close up of the French centre with artillery firing at the British
over massed columns. In the rear Latour Maubourg's dragoons move forward to
support the right flank.

02.04 Hill's brigade on the Cerro de Medellin bears the brunt of an hour's
intense bombardment. In the foreground Victor's I Corps faces Cotton's
British cavalry supported by Albuquerque's Spanish cavalry and Bassecourt's
conscript infantry. In the centre Wellington's thin red line holds against
intense artillery fire whilst in the far distance Sebastiani's infantry
advance against the Vergara redoubt.

14.30 - 15.00
03.06 In the centre, Wellington retreats his infantry on the reverse slopes
of the Cerro de Medellin to shelter his infantry from the French
bombardment. Anticipating a British retreat, Victor rashly sends his Corps
Artillery forward towards the Portina stream unprotected by infantry. In the
left foreground Latour Maubourg deploys his dragoons to face Cotton whilst
in the background Sebastiani's infantry engages in an intense firefight with
the Spanish defenders of the Vergara redoubt.

03.15 Close up of Wellington's dispositions on the Cerro de Medellin.

15.00 - 15.30
04.01 Fane's Heavy cavalry charge across the Portina and catch the advancing
French artillery unawares and wreak havoc amongst the unprotected gunners
(centre foreground). In the background, the Vergara firefight rages on.

04.02 Fane's Dragoon Guards and Heavy Dragoons cut Victor's artillery under
the eyes of the French columns.

04.04 Latour Maubourg unleashes his dragoons on Fane's disordered cavalry
catching the winded British standing. Fane is overrun and his brigade almost
entirely destroyed.

04.05 The remnants of Fane's brigade retreat back across the Portina stream
whilst the victorious French cavalry reforms. In the centre Victor sends
his infantry forward whilst in the background Sebastiani's corps keeps up
the assault on the Vergara redoubt.
15.30 - 16.00

05.01 View of the field after the French have moved. In the foreground
Latour's dragoons have crossed the Portina and reformed in line while
further afar in the centre, Lapisse's division of Victor's corps advances
towards the British positions on the Cerro de Medellin. Further back
Sebastiani keeps up the pressure on the Spanish around the Vergara redoubt.

05.02 Closer view of Lapisse's advance in the centre. To Lapisse's left, the
French bring up their cavalry in preparation of the assault.

05.06 Sebastiani's French, German and Dutch troops keep up the heat on the
Vergara defenders.
16.00 - 16.30

06.05 The situation at 16.30. In the immediate foreground, Beaumont's
cavalry brigade moves up on the flank of Albuquerque's Spanish cavalry. In
the centre the French have crossed the Portina stream in force while in the
far distance the assault on the Vergara redoubt continues in earnest.

06.06 A closer look at the centre of the field. Lapisse's and Villatte's
divisions advance en masse against Hill's and Sherbrooke's brigades while in
the foreground Latour Maubourg's dragoons gather to fact Cotton's hussars
and light dragoons.
16.30 - 17.00

07.01 The French take the initiative and Beaumont's hussars catch
Albuquerque on the wrong foot. In the meantime Bruyere's brigade of Ruffin's
division moves up to sweep the Spanish cavalry with their musketry. Further
to the left, Ruffin's other division under Barrois advances boldly on the
flank of superior British cavalry, hoping to catch them with enfilading
fire.

07.04 Albuquerque's cavalry are badly mauled in their fight against the
French and withdraw in disorder. The Spanish have also lost their artillery
to Beaumont's cavalry. The Spanish withdrawal forces Cotton to withdraw his
troops in order to prevent exposing his flank. In the centre of the field,
the storm clouds continue to gather as the French dress their ranks and
build up their forces opposite the British defenders.

07.06 The situation in the centre with the French preparing for an uphill
rush.

07.07 Around the Vergara, the fighting intensifies forcing the Spanish to
withdraw their artillery to prevent it from being damaged. Panic starts to
seep into the Spanish ranks with the defenders becoming increasingly
disordered and apprehensive.
17.00 - 17.30

08.01 In the lower foreground, Latour's dragoons charge into Cotton's
cavalry who promptly countercharge the French.

08.03 Close up of the huge cavalry clash on the plain beneath the Cerro de
Medellin as the French attacking infantry and the British defenders look on.

08.04 Charge! At the other end of the field, Sebastiani senses the Spanish
defenders of the Vergara redoubt are wavering and sends Liger's infantry in
at the bayonet.

08.06 Cotton's hussars and light dragoons are pushed back and the British
are forced to withdraw disordered. A marginal French victory!

08.08 Meanwhile, Liger has carried the redoubt putting the Spanish to
flight.

08.10 Cotton withdraws his cavalry further to allow his troopers to catch
their breath and reform. The allied left is now jackknifed at 45 degrees to
the main line, dangerously exposing Hill's left flank.

08.12 In the centre of the field the French have settled to pounding the
allied centre with artillery fire(bottom foreground). Further left, the
Spanish abandon their fieldworks and attempt to reform behind the line of
the Portina stream.
17.30 - 18.00

09.01 Wellington snatches the initiative and takes the opportunity to
reposition his line, withdrawing his left even further and pulling Hill
diagonally backwards in order to cover his exposed flank.

09.02 Cuesta, too, uses the lull to pull back and redress his line. The
allies are now well behind their starting positions but despite the
casualties sustained, the line is intact.

09.07 The divisions of Lapisse and Villatte are by now scaling the Cerro de
Medellin, engaging in a thick exchange of skirmish fire with Hill's and
Sherbrooke's infantry supported by elements of the celebrated 95th rifles.
18.00 - 18.30

10.01 Sebastiani now brings up the rest of his infantry beyond the abandoned
earthworks to face the now reformed Spanish lines. In the centre, French
cavalry mass in the dead ground beneath the Medellin heights.

10.04 Panoramic view of the field with Ruffin's division supported by
Latour's dragoons facing Albuquerque and Cotton. Further on, Lapisse and
Villatte scale the Medellin heights while further back Liger-Belair engages
Iglesias's Spanish infantry beyond the Portina.

10.06 Close up of Belair's headlong charge into the thick of the Spanish
line.

10.07 Lapisse and Villatte edge closer to the British, now withdrawn in the
shelter of woodland further up the heights.

10.09 Belair only succeeds in pushing the Spanish back by a few metres,
certainly not the result he was hoping for when considering his seasoned
regulars are only facing terrified conscripts.
18.30 - 19.00

11.02 Another view of the positions on the Medellin heights and the plain
below.

11.04 Cuesta sounds the advance in the shadow of Talavera and orders
Iglesias's infantry forward at the bayonet against Belair. Outflanked and
outnumbered, the French need to resort to all their discipline and
experience to get out of this one.

11.05 At the other end Albuquerque's infantry move forward against Barrois
isolated brigade but are repulsed. Partly visible in lower right foreground,
Bassecourt's cavalry attempt to outflank Bruyere. In the centre, the
skirmisher firefight continues between the British and French lines, now
only a couple of hundred metres apart.

11.07 Belair has miraculously repulsed the Spanish assault and prepares his
counterattack.....Move 11 reprise 18.30 - 19.00

11.09 Attack !!! At precisely 18.45 the entire French line facing the
British erupts in a massive combined arms attack.

11.11 Sherbrooke's division under assault from Lapisse's infantry, Desolles'
Guard cavalry and Merlin's chasseurs a' cheval.

11.13 On the 'Spanish' side of the table, Liger-Belair's infantry get stuck
in as well against the Spanish.

11.14 Back to the Cerro de Medellin assault, Hill's already beleaguered
division is hit by Villatte's infantry and Lautour's heavy dragoons.

11.16 The thin red line buckles under the immense pressure and gives way !
Hill's division is routed (foreground) and half of Sherbrooke's is forced to
retreat (background), leaving the other half isolated in the centre to face
the French onslaught alone.

11.18 The French complete their breakthrough moves, engaging the remnants of
Fane's dragoons and Sherbrooke's isolated infantry.

11.21 Having broken Sherbrooke's men, Merlin's chasseurs continue with their
sweep forward headlong into Mackenzie's infantry......

11.23.....and push them back (foreground). In the meantime, Liger-Belair has
successfully driven the Spanish back.

11.24 View from the opposite end of the field showing the lower heights of
the Cerro de Medellin now firmly in French hands, having successfully driven
back the remnants of Sherbrooke's division. In the meantime the British
lines start reforming further up the heights.
19.30 - 20.00
12.01 Below the heights of the Medellin, Bassecourt's Spaniards are engaged
by Barrois' infantry and Lautour's dragoons. In the background a second
brigade of French dragoons hits Anson's KGL hussars and light dragoons in an
attempt to clear the valley of British cavalry.
12.03 The French reform their columns and attempt to restore order along the
line.

12.04 Liger-Belair makes a second attempt to break the centre of the Spanish
line.

12.06 Disaster strikes Manglano's infantry ! Milhaud's dragoons ride over
the now-unmanned breastworks and catch the Spanish fully in the rear.

12.08 Taken completely unawares, Manglano's infantry and artillery melt away
under the French cavalry attack, here seen breaking through and continuing
their charge onto a second brigade of hapless Spanish which is ridden down
as well. An entire division lost in half an hour!

12.09 The situation on the French left. Despite the pressure and horrendous
casualties taken, the plucky Spaniards hold on and refuse to break.

12.11 On the other side of the table, Bassecourt's infantry has been thrown
back whilst Anson's cavalry withdraws to the safety of the British lines.

12.13 The Spaniards counterattack! Much to Sebastiani's incredulity, the
Spanish catch Liger's infantry napping and manage a flank attack.

12.15 Liger-Belair gets lucky and somehow manages to beat back Cuesta's
assault.
20.00 - 20.30 Final move

13.01 The allies take the final initiative. Wellington retires further up
the Medellin heights to reform his line while further on Cuesta launches a
further attack on the advancing French, buying enough time to rally his
wavering troops.

13.02 Another view of the field. In lower left foreground, the French have
thrown up a 40 gun grand battery which keeps wreaking havoc on Mackenzie's
division in the allied centre.

13.05 Liger-Belair is pushed back by Zayas and Portago whilst Rey's brigade
moves up in support of their beleaguered companions.

13.07 View of the field from the French left. Rey has launched his own
attack on Zayas and Portago while the remainder of Sebastiani's infantry
moves up to engage the Spanish in the dying light.

13.08 Back on the Medellin heights, Vilatte and Lapisse have launched a
final assault on the British.

13.09 The final positions before nightfall. In the foreground, the French
cavalry have regrouped whilst on the Cerro de Medellin, Vilatte has broken
Hill's division once more. Lapisse's attack has failed however and the
French general has paid with his own life, shot from his saddle during the
assault. Further back, Cuesta and Sebastiani still face each other, neither
side broken but with the Spanish badly bloodied.
At this point hostilities are halted by the failing light. The French have
lost 5,220 men and 20 guns equivalent to 11% of their forces. Wellington's
losses amounted to 5,040 men and 16 guns which tots up to 30% casualties
whilst Cuesta has suffered the most, losing 10,080 men and 18 guns or 36% of
his forces. Total allied losses therefore totaled 15,120 men and 34 guns. A
decisive French victory !
Repot and photos credit to Mike Vella